
How to List Products on Flipkart: A Step-by-Step Beginner’s Guide
Here is the complete step-by-step blog guide written in your professional Hinglish/English style.
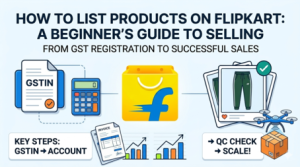
How to List Products on Flipkart: A Step-by-Step Beginner’s Guide (2026)
If you want to scale your e-commerce business in India, Flipkart Seller Hub is one of the biggest platforms to reach crores of customers. Whether you are sourcing products from local wholesale hubs like Delhi or launching your own brand, getting your products live on Flipkart requires a structured approach.
From getting your GST registration done to successfully passing the Quality Check (QC), here is a complete, beginner-friendly roadmap to kickstart your selling journey on Flipkart.
Step 1: Secure Your Business Prerequisites (The Legalities)
Before you even log into the Flipkart Seller portal, you need to collect your core business documents. Without these, you cannot legally sell on any major Indian marketplace.
GSTIN (Goods and Services Tax Identification Number): Under Section 24(ix) of the CGST Act, GST registration is mandatory for all e-commerce sellers. Even if your initial turnover is zero, you must have an active GSTIN.
PAN Card: Your personal PAN (for Sole Proprietorship) or Company PAN (for Private Limited/LLP).
Active Bank Account: A bank account matching your registered business name, along with an IFSC code and a cancelled cheque for verification.
Unique Pickup Address: The exact address (with a working Pincode) where Flipkart’s courier partners (like Ekart) will pick up your orders.
Pro-Tip for Sourcing: If you source unbranded items from wholesale markets (e.g., Delhi markets like Gandhi Nagar or Karol Bagh) and do not have manufacturer details, you can register your own firm name (e.g., Wealthywebhub) as both the Packer and Manufacturer to keep your paperwork smooth and compliant.
 Pro-Tip for Sourcing: If you source unbranded items from wholesale markets (e.g., Delhi markets like Gandhi Nagar or Karol Bagh) and do not have manufacturer details, you can register your own firm name (e.g., Wealthywebhub) as both the Packer and Manufacturer to keep your paperwork smooth and compliant.
Step 2: Register on Flipkart Seller Hub
Once your documents are handy, the onboarding process takes less than 10 minutes:
Go to seller.flipkart.com and click Start Selling.
Enter your working mobile number and email ID, then verify them using the OTP.
Input your GSTIN. The system will automatically fetch your legal business name from the government database.
Provide your Pickup Address. Ensure the pincode is serviceable by Flipkart Logistics.
Add your Bank Account Details where Flipkart will transfer your secure payments (usually processed within 7 days of delivery).
Give your virtual store a unique Display Name—this is the brand name customers will see on the platform.
Step 3: Understand Brand & Category Approvals
Before uploading individual products, navigate your dashboard to check if your target category requires approval.
Generic/Unbranded Selling: If your product is unbranded, you can list it under a generic tag.
Brand Listing: If you want to sell under your own registered trademark or an established brand name, you must upload a Brand Authorization Letter, Trademark Certificate, or a valid Purchase Invoice to prevent counterfeit rejections.
Step 4: Step-by-Step Product Listing Process
Flipkart offers two listing methods: Bulk Listing (via Excel templates for huge catalogs) and Single Listing (ideal for beginners or limited stock). Here is how to complete a Single Listing:
Log into your dashboard, go to Listings > Add New Listing > Add a Single Listing. Search for your product or browse the manual index. For instance, if you are selling lower wear, your path will look like this:
Men ➔ Men Western Bottom Wear ➔ Track Pants
2. Upload High-Resolution Images
Images make or break your online sales. Flipkart’s standards state:
Minimum resolution should be 500 × 500 pixels (8k or professional studio lighting is highly recommended).
Use a pure white background (RGB 255, 255, 255).
Upload at least 2 to 4 angles (Front View, Back View, Side View, and a Close-up or Zoomed shot to highlight material quality).
3. Define Price, Stock & Inventory Details
Seller SKU ID: Create a unique identifier code for internal tracking (e.g.,
DKGRN-TRK-01).MRP vs. Selling Price: Set your Maximum Retail Price (MRP) and your actual Selling Price. Note: Your selling price must always be lower than the MRP.
Fulfillment Model: Choose whether you will use FBF (Fulfillment by Flipkart) where Flipkart handles storage and packing, or the Self-Ship / Non-FBF Model where you pack items yourself and a Flipkart executive picks them up from your warehouse.
Shipping Charges: Set local, zonal, and national delivery rates clearly.
4. Fill Product Specifications & Government Regulations
This is where you fill out mandatory item details. Provide clear attributes like Color, Fabric (e.g., Polyester/Cotton), Fit (Regular/Slim), Number of Pockets, and the complete Product Description.
Additionally, you must fill out compliance data: Country of Origin (India), along with the Name, Address, and Pincode of the Manufacturer and Packer.
Step 5: Submit for Quality Check (QC) Approval
Once all fields from 1 to 31 are filled out, hit the Submit button. Your listing will move into the QC in Progress phase.
Flipkart’s team takes roughly 24 to 48 hours to verify the listing. They ensure your text matches the images, the images don’t have text overlays like price tags, and the weight/dimensions look accurate.
If Approved: Your product status updates to Active, and it goes live instantly to buyers across India.
If Rejected: Don’t panic. Check the QC remarks tab, fix the highlighted error (like blurred images or wrong category selection), and resubmit.
Step 6: Managing Your Live Orders & Scaling up
Once your inventory is live, monitor your Flipkart Seller Central Hub dashboard daily:
Keep your stock counts accurate to avoid “Out of Stock” cancellations, which can negatively hit your seller rating.
Process pending orders quickly to improve your reliability score, helping you win the FAssured badge for faster delivery visibility.
When your organic sales steady, utilize Flipkart Ads and promotional sale events (like Big Billion Days) to aggressively scale up your conversion numbers.

Written By
Pankaj
Pankaj is the founder of WealthyWeb.in, a platform dedicated to genuine digital skills, AI tools, and online earning education. He works as a Senior Facility Executive while pursuing his MBA in Operations & Supply Chain Management, bringing real-world operations and analytics experience to every guide he writes. He is passionate about helping students and beginners avoid scams and find practical, honest ways to grow online.